
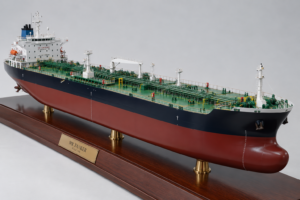
The SS Edmund Fitzgerald is one of the most storied vessels ever to ply the Great Lakes, forever memorialized by Gordon Lightfoot’s haunting ballad. Crafting a scale model of the Fitzgerald lets you bring this legend to life—complete with her distinctive profile, weathered paint scheme, and atmospheric Great Lakes backdrop. In this blog post, we’ll cover everything you need to know: choosing the right kit, prep work, assembly, painting and weathering, diorama ideas, and display tips.

1. Choosing Your Kit and Scale
There are several manufacturers offering SS Edmund Fitzgerald kits in popular scales:
- 1:250 (e.g., American Ship Models)
- Pros: Large enough for intricate detail; impressive deck fittings.
- Cons: Requires more display space and paint.
- 1:350 (e.g., Lindberg)
- Pros: Balanced size—detail-friendly yet space-efficient.
- Cons: Some tiny parts can be fiddly.
- 1:700 (various brands)
- Pros: Compact; ideal if you want her alongside other lake freighters.
- Cons: Limited superstructure detail; mostly for display rather than close-up work.
Tip: If you’re a beginner, start with 1:350. You’ll have enough room to paint cabins, railings, and lifeboats without extreme difficulty.
2. Preparing Your Workstation
Before opening the box:
- Clean, well-lit area. A desk near a window or under a bright lamp.
- Basic tools:
- Sharp hobby knife
- Fine sandpaper or sanding sticks (400–800 grit)
- Precision tweezers
- Plastic cement (solvent-based for styrene)
- Thin cyanoacrylate (super glue) for tiny brass or photo-etched parts
- Paints and primers:
- Primer: Light gray or white to reveal seams and flaws.
- Deck & hull colors: Rust-red or “hull red” for the bottom; mid-gray or “lake freighter gray” for the superstructure.
- Detail colors: Black (smokestack cap), white (deckhouses), orange (lifeboats), brass or metallics for winches and cranes.
- Masking supplies:
- Low-tack model masking tape
- Micro‐mask for tiny windows or portholes
3. Assembly Step–by–Step
A. Hull & Deck
- Dry-fit first. Snap or clamp the two hull halves together to check alignment.
- Glue one joint at a time. Apply solvent cement along the seam, then press and hold for 10–15 seconds.
- Fill gaps: Use modeling putty sparingly; sand smooth when cured.
- Attach the deck: Ensure it seats evenly. Look for locating pins or tabs.
B. Superstructure & Pilothouse
- Clean up flash: Carefully trim any excess plastic from walls and corridors.
- Glue walls in sequence: Base deck first, then main deckhouses, then the pilothouse.
- Add fine details: Railings, ladders, vents, and life rafts. If your kit includes photo-etched brass railings, bend gently and secure with thin CA glue.
C. Masts, Cranes & Winches
- Cranes: These often come as multi-part assemblies. Test fit booms before final gluing.
- Rigging lines: Many modelers add scale-thickness black thread or 0.08 mm fishing line to simulate cables and stays.
- Radar and antennas: Paint them white or light gray; attach with a drop of super glue.
4. Painting & Weathering
A. Base Coats
- Primer: Spray a thin, even coat—this reveals imperfections and gives paint something to bite.
- Hull red primer: On the underwater hull only; mask off above-water areas.
- Gray superstructure: Use an airbrush for a smooth finish. If using brush paints, apply many thin coats.
B. Deck & Detail Colors
- Decks: Antique white or light creosote-brown to simulate weathered wood or steel.
- Lifeboats: Safety orange with white interiors.
- Metal parts: Flat metallic or brass.
C. Weathering Techniques
- Panel shading: Airbrush a slightly darker gray around bulkheads and plating lines.
- Wash: Thin black or dark brown enamel wash flows into panel lines and around rivets. Wipe away excess with a damp cotton swab.
- Rust streaks: Using oil paint (burnt sienna or rust brown), apply spots around hatches and funnels; drag downward with a clean brush dampened in thinner.
- Chipping: Lightly sponge silver or the primer color onto high-wear areas (deck edges, hatch covers).
5. Diorama & Display Ideas
A. Great Lakes Setting
- Water base: Acrylic “water” kits can simulate gentle waves. Tint the base a deep teal, with white-tipped swells.
- Pier or lock wall: Scratch-build a concrete dock, add rail tracks and cargo cranes to evoke a mid-20th-century ore terminal.
B. Stormy Seas Scene
- High seas: Sculpted waves, tilted fore and aft, give drama.
- Spray effects: Use clear gloss medium flicked onto the hull’s bow.
- Lighting: A small LED under the hull can illuminate the “water” from below.
C. Seasonal Themes
- Winter: Dust the deck lightly with baking soda or a matte white pigment to suggest frost.
- Night mode: Add tiny fiber-optic lights to pilothouse windows and the mast for a nocturnal harbor scene.
6. Final Tips for a Stunning Finish
- Patience is paramount. Let glue and paint cure fully before handling.
- Use magnification. A desk‐mounted loupe or headset saves frustration when gluing tiny parts.
- Document your progress. Photos help you remember where details go and make a satisfying before-and-after gallery.
- Protect your model. Once complete, dust lightly and consider enclosing in a clear acrylic case, both to showcase your work and to guard against dust and curious hands.
Building an SS Edmund Fitzgerald model is more than a hobby—it’s a tribute to a vessel whose legend still haunts Lake Superior. With careful assembly, realistic painting, and a thoughtful display, your model will not only honor maritime history but also serve as a conversation piece that captures the spirit of “The Pride of the American Side.” Enjoy the process, and fair winds on your modeling journey!


 日本語
日本語  English
  Dansk
Dansk  Deutsch
  한국어
한국어  Français
  Italiano
  Suomi
Suomi  Bahasa Indonesia
  Polski
  Português do Brasil
  简体中文
简体中文  Türkçe